MaxScripts for 3ds Max |
Maya, Unreal, and Unity Tools |
|
I cook up handy MaxScripts to make the lives of video game developers easier. Feel free to contact me with feedback and/or requests.
|
Unfortunately all of my Maya, Unreal, and Unity tools are NDA. But I'm proficient in MEL, Python, QT, C#, and Blueprint.
|
How to install a MaxScript
- Copy MCR files to the UI/MacroScripts folder.
- Copy MS files to the Scripts folder.
- Copy BMP files to the Scripts folder.
- Copy GUP files to the Plugins folder.
- Restart Max.
- Look in the monsterBlues category to bind to a hotkey.
Note: If a file type doesn't exist, skip the step.
Click on a script name to downloadFace Weighted Normals
Face Weighted Normals or FWN will add an Edit Normal modifier and bend all the normals toward faces with larger area. This gives the model a smoother look and normal maps will have less gradients when generated. Render Gradient Map It's becoming popular to overlay a gradient to give emphasis to more important areas of a character. (See DOTA2 style guide.) This script will take your object selection and apply a gradient in object space for each object and render it out to a texture. Auto Perspective View I don't like to use Orthographic views when animating. If you rotate the Top or Front view, this script will automatically convert the Orthographic view to Perspective. Put it in the script Startup folder. Attach and Detach Skin Modifier This tool lets you attach and detach objects that are skinned. The skin weighted is preserved when combining and detaching. Grid Move I liked using Discreet Move in Maya. In 3ds Max Grid Snapping only works on the ground plane. With Grid Move objects will snap to the closest point on the grid. Skin Replace Weights Have you ever started skinning an object to the wrong bone? Or have you ever needed to reduce your bone count? Replace Weights will give all the weighting from one bone to another. Grow By Material ID Simple script that will expand your selection to adjacent faces with the same material ID. KeyTools This is an assortment of tools for the curve editor. Drag and Drop the MZP file into the viewport to install. Update: KeyTools is now officially part of 3ds Max 2017! You no longer need to download if you have that version. BIP_Explorer This tool lists BIP animation in the selected folder. It's perfect if you have hundreds of BIP from a mocap shoot. Frame Number When enabled this tool displays the frame number, time, and perfect through an animation relative to the start frame. Mirror Morphs This tool will help create mirrored morph targets. First initialize the model to find matching vertices, then edit one side of the model. Who's My Quad? This tool will select all non quad polygons in the selected edit poly object. In newer versions of Max use the Ribbon > Selection panel. Skin Weight Tools This is a group of simple tools used with the skin modifier. ReOrder Objects This tool allows you to adjust the object creation order. Handy if you are having alpha sorting issues. CenterPivot2Origin This tool simply centers the pivot for selected objects and moves them to the origin. Toggle NurmsLevel This tools cycles Nurms iterations from 1 to 2 to off. Increment TurboSmooth This tool will increase Turbosmooth iterations by 1 on the selected objects (Upper limit is 5 iterations). Holding the Shift key will decrease. TCB Presets This tool will adjust biped key TCB properties with presets. Texture Area This tool will report how much of a texture sheet you are using in percent. For example a mirrored character UV's should use close to 200% of a texture. Skin2Physique* This tool allows you to convert Physique Modifiers to Skin Modifiers and back. For Max 9 and older. MirrorWeights (Physique)* This tool will help you mirror Physique skinning. For Max 9 and older. *(Unfortunately Skin2Physique and MirrorWeights only work with 3ds Max 9.0 and older. For newer versions of 3ds Max, the best way to convert a Physique Modifier to a Skin Modifier is to export to an FBX file and then re-import into the same scene. Then bake the imported Skin with the Skin Utilities. Finally, transfer them to the original model and bones. This link to the Max Help file has info on how to use the Skin Utilities.) Macro_PolyCounter This tool displays the correct number of triangles for selected objects. For Max 9 and older. Remove Edge Loops and Rings This tool removes edge loops or rings. For Max 6 and older. |
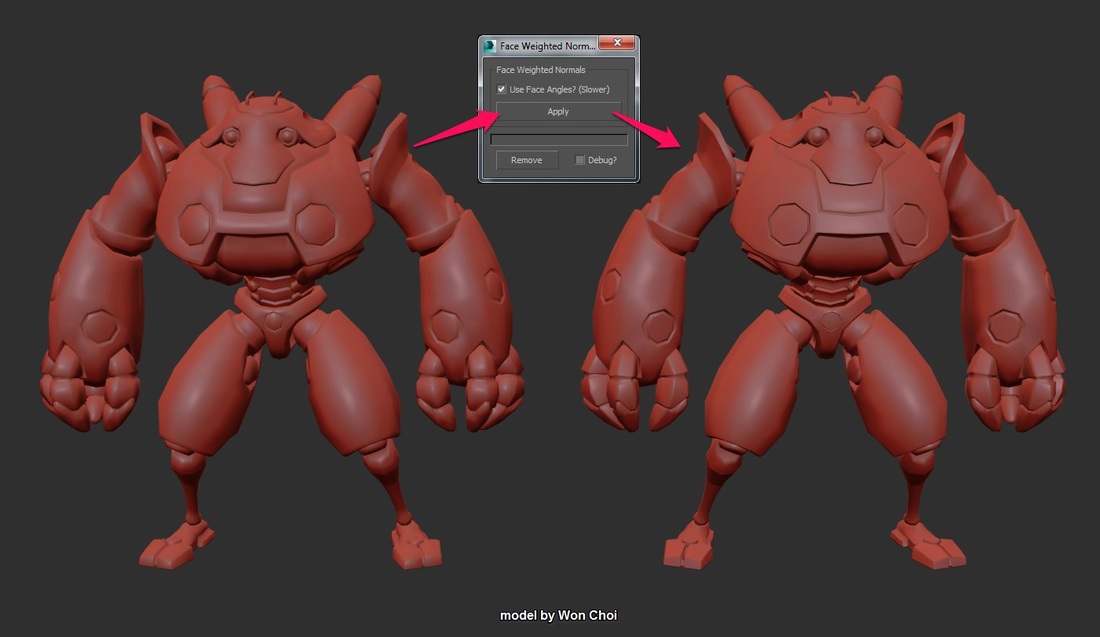
Face Weighted Normals
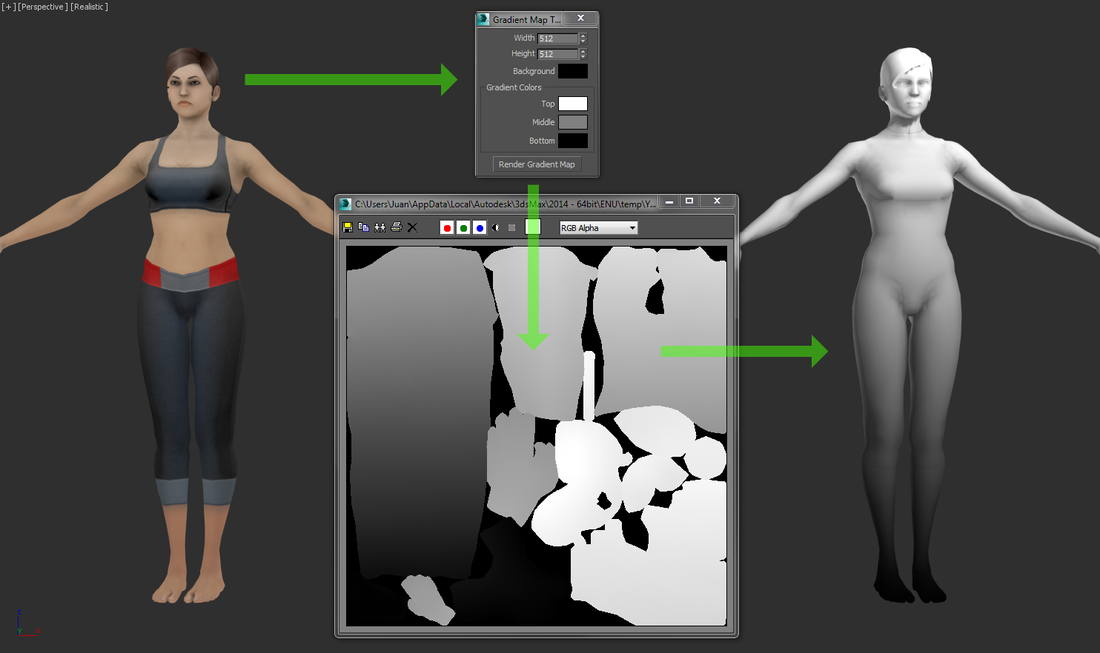
Render Gradient Map
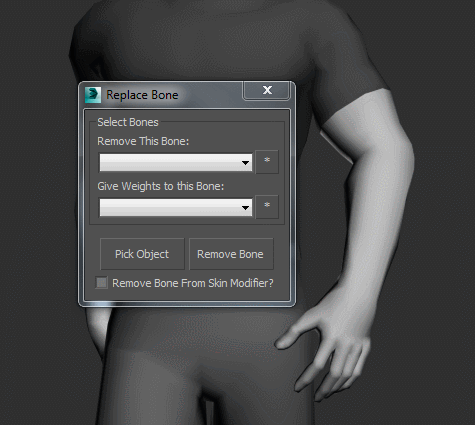
Skin - Replace Weights
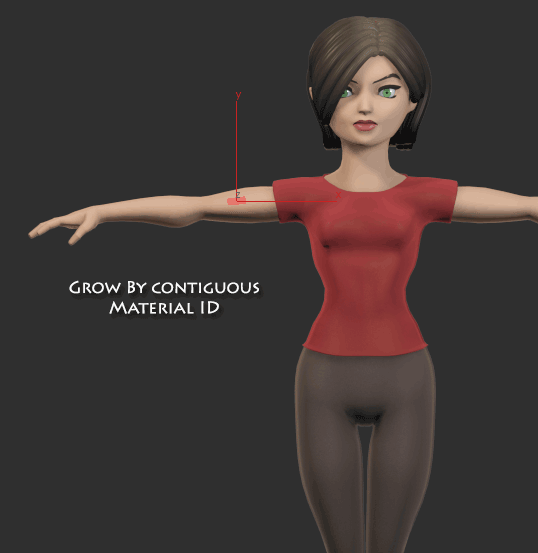
Grow By Material ID
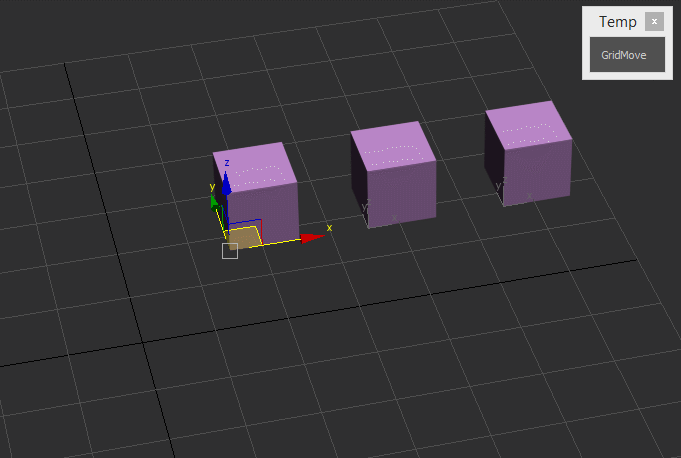
Grid Move
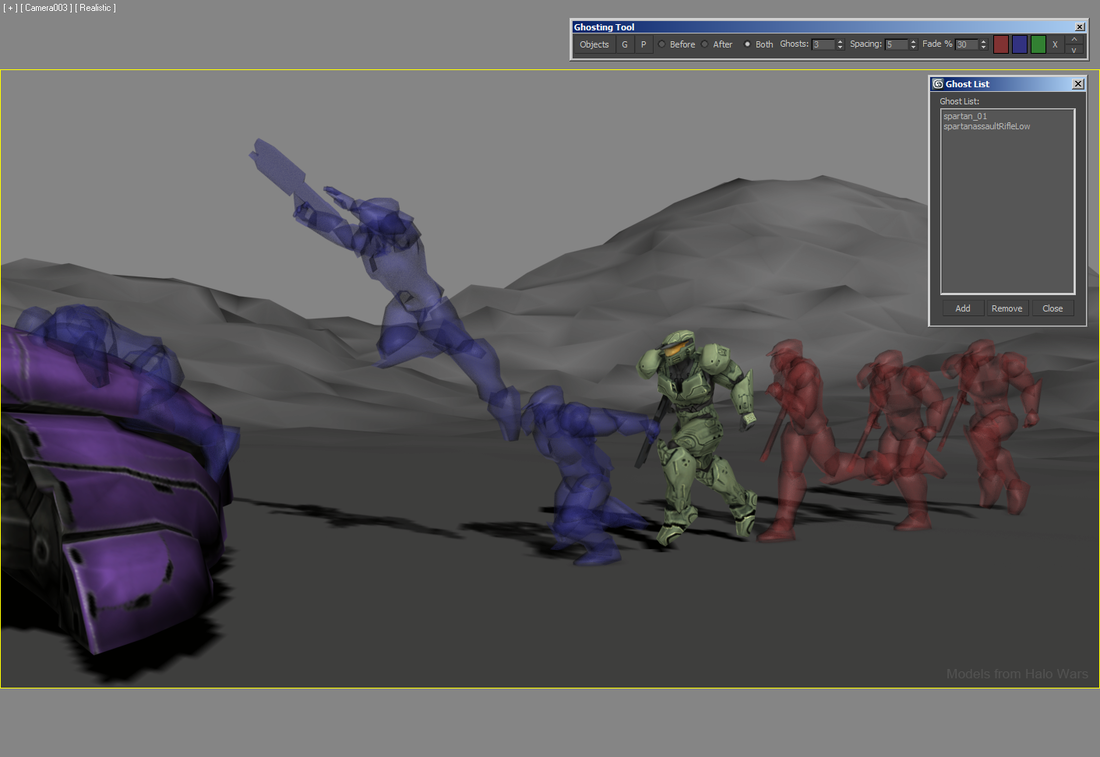
Ghosting Tool
|